Still Photography
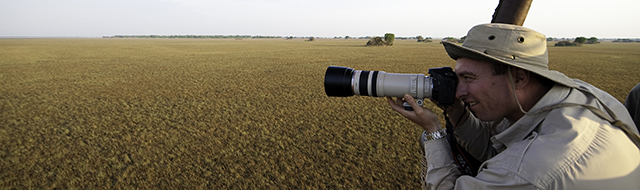
We firmly believe that the first priority for anyone venturing on safari should be to maximize the experience while you are there, and not to allow technological distraction to get in the way of your full participation in, and enjoyment of, the safari. Having said that, it's also a shame not to take advantage of the technology available today to bring home unforgettable memories from some of the most beautiful and unspoiled natural settings on earth. The secret is finding a balance by understanding your goals, ambitions, and abilities as a photographer, and choosing an approach (and equipment) to match. The table below lays out four generalized approaches to safari photography, with guidance on matching equipment choices.
| Level I | Level II | Level III | Level IV | |
| Safari Experience | First time or repeat safari, priority is minimal hassle | First time safari, or repeat safari, looking for higher quality images | Repeat safari, or experienced photographer on first safari | Repeat safari |
| Photography Experience | Beginner | Novice to intermediate | Intermediate to advanced | Advanced to professional |
| Camera Body | Smartphone | Compact megazoom camera (e.g. Leica V-Lux; Sony Cyber-shot) | Interchangeable-lens, mirrorless camera; "full frame" is better. | Two or more "full frame" top-of-the-line mirrorless bodies |
| Lens(es) | Phone lens(es) | Built in lens with a zoom range of 50x (or more) | Two image stabilizing autofocus zoom lenses covering range from approx. 30-400mm (e.g. 24-105 mm f4 Plus 100-400mm f/4.5-5.6) | Three or more image stabilizing autofocus zoom (or prime) lenses covering range from approx. 14-400mm or 500mm (e.g. 24-70mm f/2.8 Plus 70-200mm f/2.8 Plus 200-400mm f/4 |
| Tripod | N/A | N/A | Consider a lightweight carbon fiber tripod | Lightweight carbon fiber tripod |
| Bag | Protective phone shell | Padded carry pouch | Well padded backpack with internal compartments, all weather cover, and tripod straps | Well padded backpack with internal compartments, all weather cover, laptop compartment, and tripod straps |
| Filters | N/A | N/A | Polarizer; graduated neutral density filter(s) | Polarizer; graduated and split neutral density filters |
| Batteries and Memory Cards | Remember your charging cord. | Be sure to take extra batteries (at least one or two extra batteries), as well as a battery charger. Take more memory cards than you think you might need - the conventional wisdom is to take several smaller capacity cards rather than one large card so that, if you lose a card, you don't lose all your photos with it. | ||
| Apparel | N/A | Safari shirt with pockets (for extra batteries and memory cards) | Safari shirt with pockets (for extra batteries, memory cards), and filters) | Safari / photographer's vest (for extra lenses, batteries, memory cards, and filters) |
| External Storage Devices | Consider photo backup device | Consider an external storage device | External storage device or Multimedia storage viewer | Laptop computer plus external storage device |
| Image File Format | JPG | Large JPG | Large RAW | Large RAW |
| Photo Editing | In-phone | Use software that came with your camera (consider Photoshop Lightroom) | Photoshop Lightroom | Photoshop plus Photoshop Lightroom |
| Private Vehicle and Guide | N/A | N/A | Worth considering (adds significant value) | Almost a given |
| Extra Seat on Charter Flights | N/A | N/A | Might be necessary (or pack very light) | Unavoidable |
| Scheduled Flights | Always take your phone as carry on | Always take camera gear as carry on | Pack camera gear wisely to meet carry on constraints (46" total dimensions, 18lbs) | Risk of camera gear ending up in the hold |
| Photography Classes | Online videos | Online videos | Recommended for anyone going on safari for the first time, and/or taking new equipment | Study animal behavior, research photogenic landscape features. |
Level I - The Minimal Hassle Approach (Smartphone)
As smartphone technology advances, the quality of images and video continues to improve, and we are increasingly impressed by the safari images and video that clients capture on their phones. And smart phones represent the quintessence of simplicity and convenience - they are small, light, easy to use, easy to keep charged, and very unobtrusive. For taking photos of people, we actually recommend using a smartphone because everyone, even in remote villages in Africa, is accustomed to it.
Safari involves a lot of bumping and dust, so be sure to have a good quality protective shell or cover. Also don't forget your charging cord - virtually all safari camps have charging points in the rooms, some even on the safari vehicles. You will likely take a lot of photos, and will not be able to back them up to the cloud, so consider a small photo backup device that plugs right into the phone's power socket (or connects via Wi-Fi). Finally, a little homework can go a long way to improved video and photo- watch online videos about your phone's capabilities (including in-phone editing apps), and get outdoors to practice some nature photography before your safari.
Level II - The Higher Quality Approach (Compact Megazoom)
The very compact size of smartphones creates some inherent photographic limitations such as minimal optical zoom capabilities and small sensors that curtail the quality of safari images and video that can be created. To get more zoom capability and larger image size, one needs a bigger device with a larger lens and processor. If you are looking for better quality images than a smartphone can deliver, but like the "point and shoot" simplicity of an all-in-one package, a "compact megazoom" (also called "superzoom") is the logical progression, and all major camera manufacturers offer them.
These cameras look and feel like miniature mirrorless cameras, but they have integral (i.e. non-interchangeable) "megazoom" lenses with an optical zoom factor of 50x or higher (pay no attention to digital zoom when considering cameras - optical zoom is what counts). Weighing a little over a pound (and costing $400-$2,500), these "compact megazooms" can capture high resolution images. Other SLR-type features found on these cameras include manual exposure and metering controls, various program settings, image stabilizing lens technology, high ISO sensitivity, and the option of capturing pictures in RAW format.
The main downside of these "compact megazooms" relative to interchangeable-lens cameras is that they give up a certain amount of image quality to achieve their impressive magnification. Depending on your expectations (and budget), and how you plan to present your images on return (digital formats are more forgiving than large prints), this may or may not be a factor - for most safari travelers, a "compact megazoom" is the ideal camera choice.
Be sure to have a well-padded carry pouch to protect your camera, and take extra batteries and plenty of memory cards. It's helpful on game drive to wear a shirt or jacket with lots of pockets, so that your spare batteries and memory cards are readily available. Set the camera to shoot in large JPG format. Once home, you have the option of editing your photos on your computer using image editing software - editing options are more limited with JPG as opposed to RAW, but even JPG images can often by significantly improved by simple cropping to improve composition; a plethora of free software exists for simple editing functions .
We recommend taking online classes to help you master the basic functions and program modes on your camera, and learn some of the basic principles of nature photography.
Level III - Serious Photographer (Interchangeable-Lens Camera)
Before taking the step (and investment) to Level III it's worth considering your photographic background and goals. If you don't have extensive prior experience with photography, and/or don't intend to continue with photography as a serious hobby after your safari, the cost and learning curve are probably too steep to justify this approach. This approach only makes sense if you are (or want to be) a serious photographer.
If buying new or upgrading, we recommend mirrorless over DSLR bodies. Not only are major camera manufacturers transition from DSLR to mirrorless technology, but mirrorless also has several advantages on safari, including lighter weight, faster focus/shooting, and much better video capability. We recommend one "full frame" body plus two good quality lenses that cover the range from wide angle (+/- 24mm) to super-telephoto (400mm or 500mm). Buy the best quality glass that you can afford.
We recommend going with an established brand, probably Canon or Nikon (or Sony, the mirrorless trailblazers). When selecting your camera, try to get to a store where you can try out different models to get a sense for which one has controls that feel easiest and most intuitive. It's also worth thinking about the future - does one or other brand have higher end lenses or bodies that you might one day want to upgrade to? Once you start down a given brand path, it's a fairlycostly proposition to change brands at a later point (having already amassed equipment). Full frame cameras have two attractive advantages over "cropped sensor" bodies on safari: one is wider angle landscape shots, and the other is less "noise" at higher ISO settings (which is helpful for shooting under low light conditions, around sunrise and sunset).
If you would like to experiment with creative photography, consider taking a lightweight travel tripod for landscape shots, time-lapse video, and astral photography. A polarizing filter can add to the quality of your landscape shots, and a graduated neutral density filter helps with sunset shots.
Backing up your photos becomes important at this level of photography. One approach is to take a simple, lightweight data storage device. The next step up is a multimedia viewer, which has the added benefit of a high-resolution screen for reviewing images. Reviewing images while still on safari will help you fine-tune your technique, and you can prevent yourself from being overwhelmed by the volume of images at the end of the trip by deleting obviously bad/blurred images along the way.
All of this equipment, including extra batteries, memory cards, filters, chargers, etc. has to fit into in a sturdy, well-padded bag (preferably a backpack), with internal compartments. Having a backpack makes it much easier to carry through airport terminals (roller bags have rigid frames which are not allowed on charter flights). We use a Lowepro Flipside 400AW, which also includes an all-weather cover and straps to hold a small travel tripod. It's helpful to take safari shirts and shorts/trousers with several pockets.
If you're investing this much time and effort in bringing home quality images, you're going to want to optimize them with editing software, which means shooting in RAW. Photoshop is probably a bigger and more complicated program than you need, so consider Lightroom, which is much more intuitive and user-friendly.
In terms of value-added services on your safari, it's worth considering a private vehicle and guide (at least for some of the time), to provide maximum flexibility for pursuing your photographic priorities. An important practical consideration is the luggage restriction on flights. For scheduled flights, to ensure that your camera equipment can all go with you as carry-on luggage (which is essential), the weight has to be under 18lbs and the total dimensions (length + breadth + height) have to be under 46". Charter flights differ by country in terms of the luggage allowance but, no matter where you travel, you are going to have to be very strict with your clothing to accommodate all this camera equipment. If you aren't able to make the cutoff, it will be necessary to pre-book an extra seat on your charter flights (don't take a chance and wait until you get refused boarding on a flight - the extra seat needs to be booked in advance). It goes without saying - be very familiar with your equipment and brush up on your photography skills before the safari. Don't be too proud to take some classes. Most medium to large camera stores offer classes, or can direct you to someone who does.
Level IV - Professional Grade Photographer (Multiple Bodies and Lenses)
Photographers at this level already know their equipment extremely well, and probably have some experience with nature photography in remote settings. Having two (or more) full-frame bodies provides the benefit of greater flexibility and speed to switch between setups while shooting at a sighting. Your lens quiver should include a good wide angle (e.g. 24-70mm f/2.8) for landscape and people shots, a 70-200mm f/2.8 for "animals in their environment" shots, and a super-telephoto (400mm or 500mm) for wildlife closeups and bird shots.
For the super-telephoto lens, photographers will debate the relative merits of zoom versus prime lenses - we have used both, and there is no doubt that the zoom lens is more versatile, and will enable you to make the most of any given sighting; unless you have the luxury of returning for multiple safaris, this is almost certainly the right choice. Having said that, most of the ultra-large format wildlife photos hanging on our office wall were taken with a 500mm prime lens (600mm is too restrictive, in our experience).
A lightweight carbon fiber tripod is great for landscape shots, time-lapse video, and astral photography.
Backing up images is even more important at this level, and a laptop can be used not only for data storage, but for a more thorough review and editing of images at the end of each day. Level IV photographers will need more than the relatively basic image editing and management capabilities of Lightroom, and will probably want to complement this with the full version of Photoshop.
To protect your equipment, consider only the sturdiest camera bag(s), offering the best padding and protection. The style of bag depends on personal preference, but it should ideally be within the parameters for carry-on luggage (46" total size, which is calculated by adding length, breadth, and height). Taking this much camera equipment on safari is inherently risky - it's unlikely that the weight of your camera equipment will comply with the 18lb limit for carry-on luggage, and there is a chance that you will be required to check your camera bag (with disastrous consequences). There are strategies to "work around" the weight limit (carry your bag with minimal fuss, and board flights early so that you can fit your bag into an overhead luggage compartment), but there's no guarantee that you won't caught out somewhere along the way. One doesn't adopt a Level IV approach to safari photography lightly.
Unless your traveling companion is willing to let you take up half of her/his luggage allowance with your clothing and toiletries, you'll almost certainly need an extra seat on your charter flights. And a private vehicle and guide makes eminent sense.
While photography classes can't teach you much, it won't hurt to do some research on the habits and behavior of the animals that you are going to be photographing - being able to anticipate what your subject might do in particular circumstances will enable you to take full advantage of any opportunities (e.g., if a leopard is moving towards a tree with a carcass, it's probably going to leap into the tree with its prey, and this will happen in the wink of an eye). Also research any particularly spectacular landscape features in the areas to which you are traveling (e.g. the Okavango Delta, Zambezi Valley, and Maasai Mara are not only rich in wildlife, they are also spectacular landscape subjects in their own right).